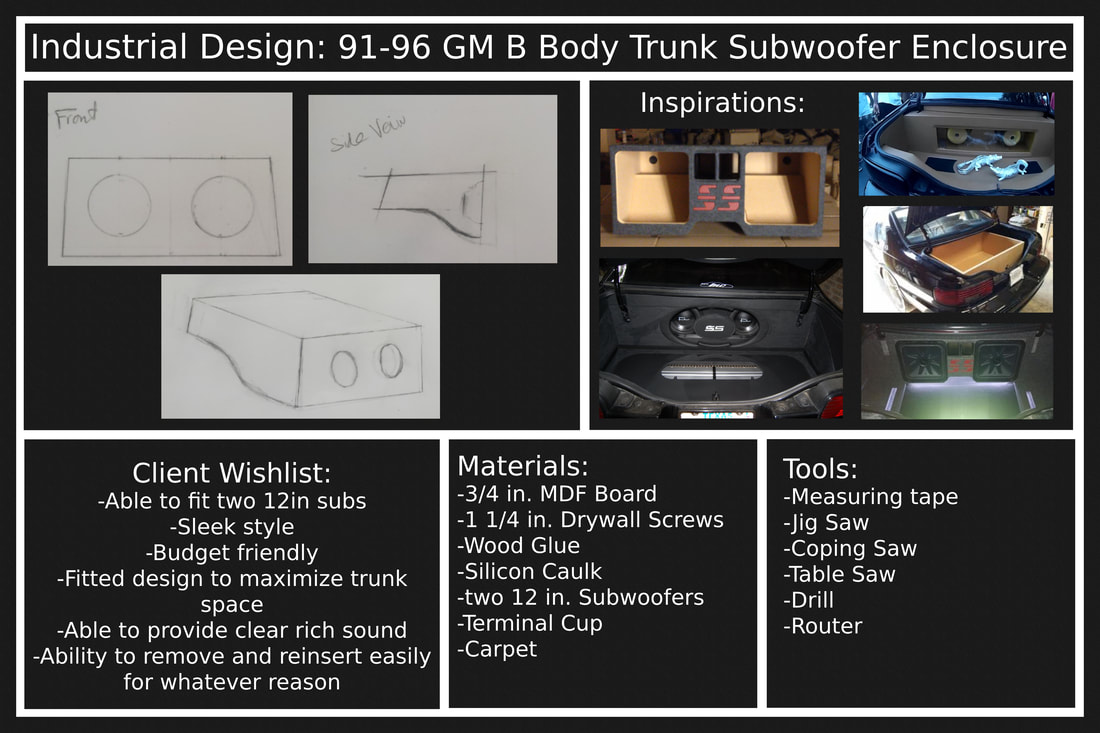
Industrial Design: 91-96 GM B Body Sedan Trunk Subwoofer Enclosure
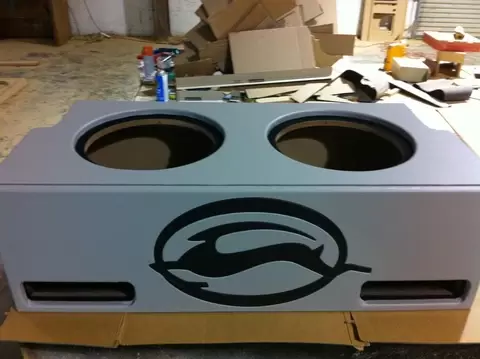
Double 12
30in x 20in at 170DPI
Exhibition Text
Using a websit, known as photopea which is a free online photoshop, I created a presentation board to display my design for my product. This piece required a lot of research as well as creativity to try and figure out how I could use aspects others have already used, and then modify those aspects to make sure my product has the best functionality possible and go beyond other models. My biggest challenge was taking measurments while trying to account for other items he planned on installing im his vehicle, while trying to reach 2.5 cubic feet for peak perforamce from these subs without taking up valuable trunk cargo space. I read online forums and reviewed many pictures to find which styles would work best for this application.
P.O.V.
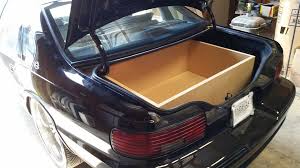
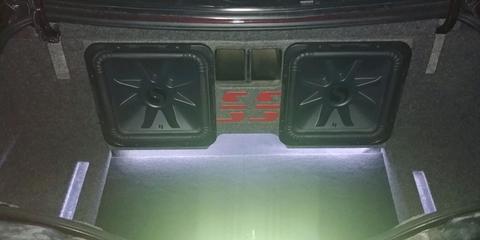
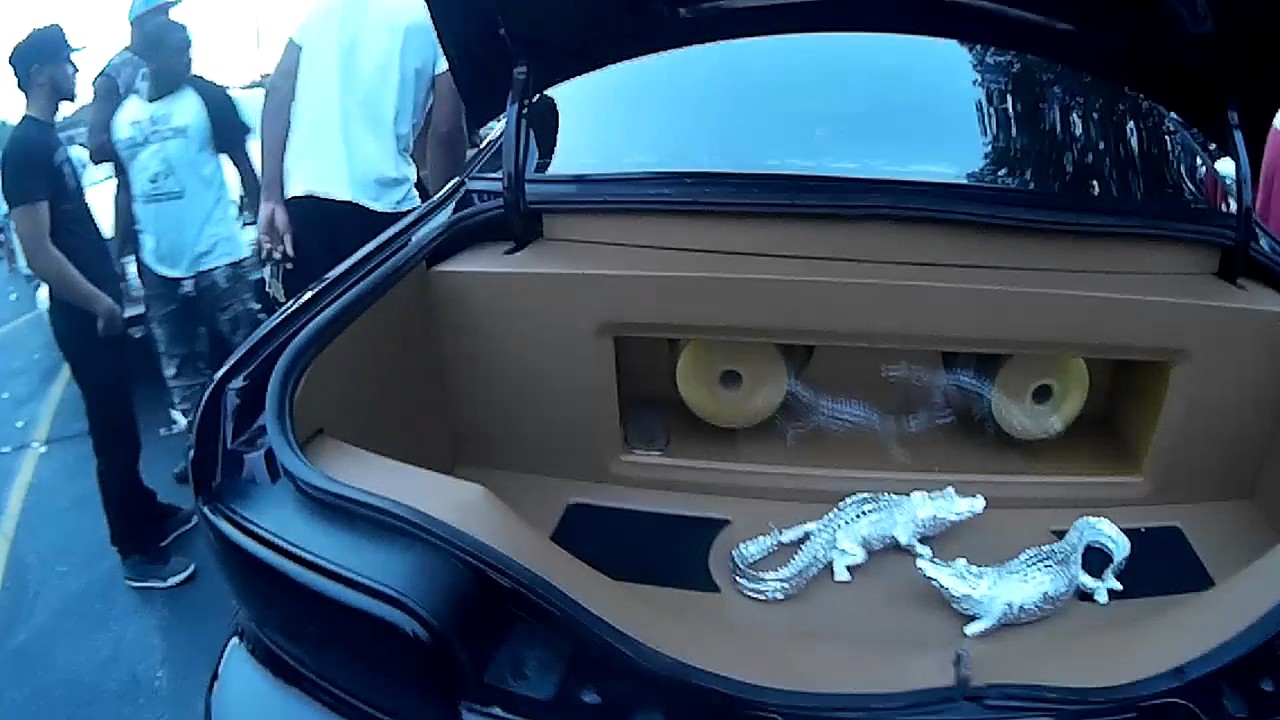
Not receiving attention in the last 7 years, I took it upon myself to try my best at "restoring" a 1996 Chevy Impala SS back to its full potential. A key area that this needed work on was the trunk space. After talking with the owner, I found that he wanted to include a subwoofer box, but never found one he liked. While brainstorming on the overall design of the subwoofer box, I sat down with the owner of the car to better understand what he wanted from this box. He explained to me that he wanted something that had clean lines and looked like it belonged with the car. His biggest complaint about the previous subwoofer boxes he had used were that they would stick out like a sore thumb, and they took up to much of the cargo space. They were big, boxy, and didn't "follow the flow of the car". He wanted something that looked presentable while still being able to keep the functionality of a trunk. After having the car for 22 years, the owner felt it was time to fix the car once and for all to his liking. He isn't the type of person to blast heavy bass music all day, but he had been wanting something that would provide that extra little punch of low end bass whenever he decides to take it out for a drive. He wanted to keep his old subwoofers instead of buying new ones, just to save some money. These subs are Dual DS12's. After researching online, I found that these subs perform at peak performance in an enclosure that allows for 1.25 cubic feet per sub.
See, Think, Hear, Feel
|
I See...
|
I Think...
|
|
I Hear...
|
I Feel...
|
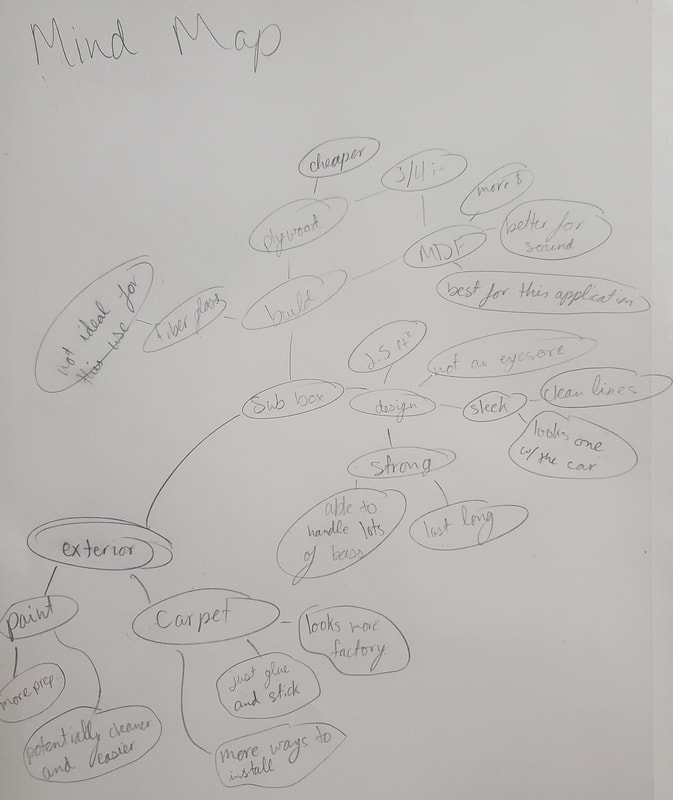
Mind Map
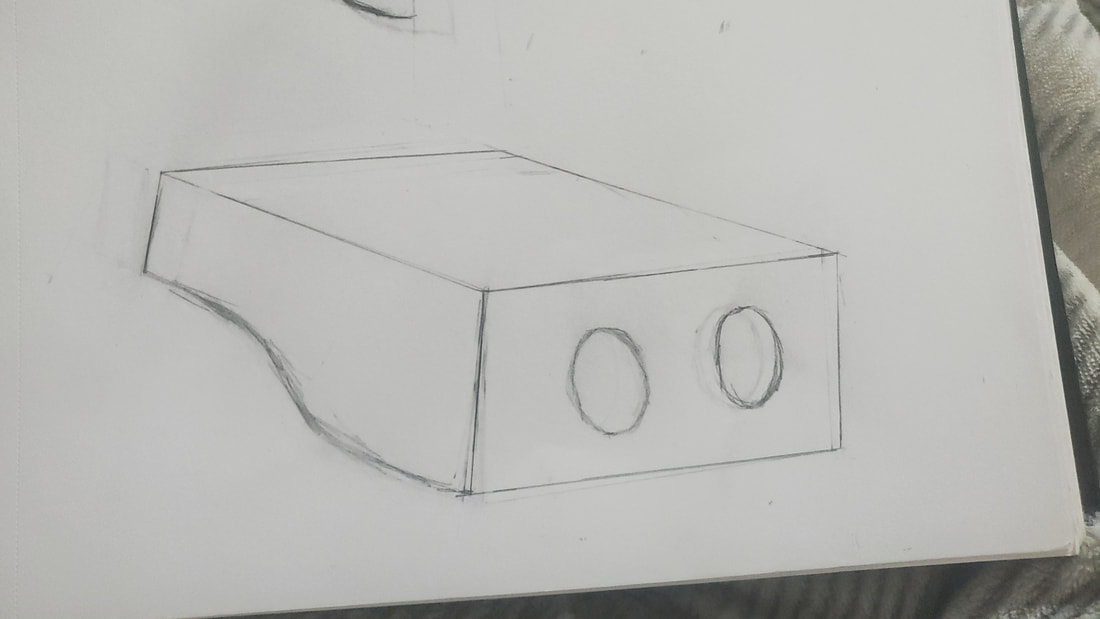
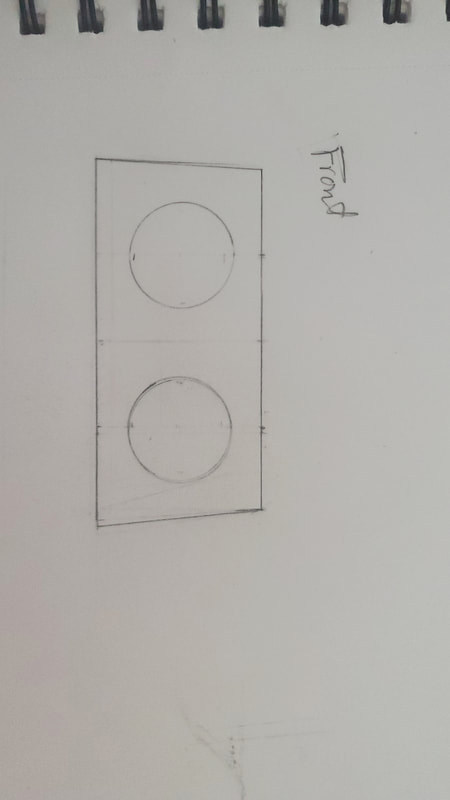
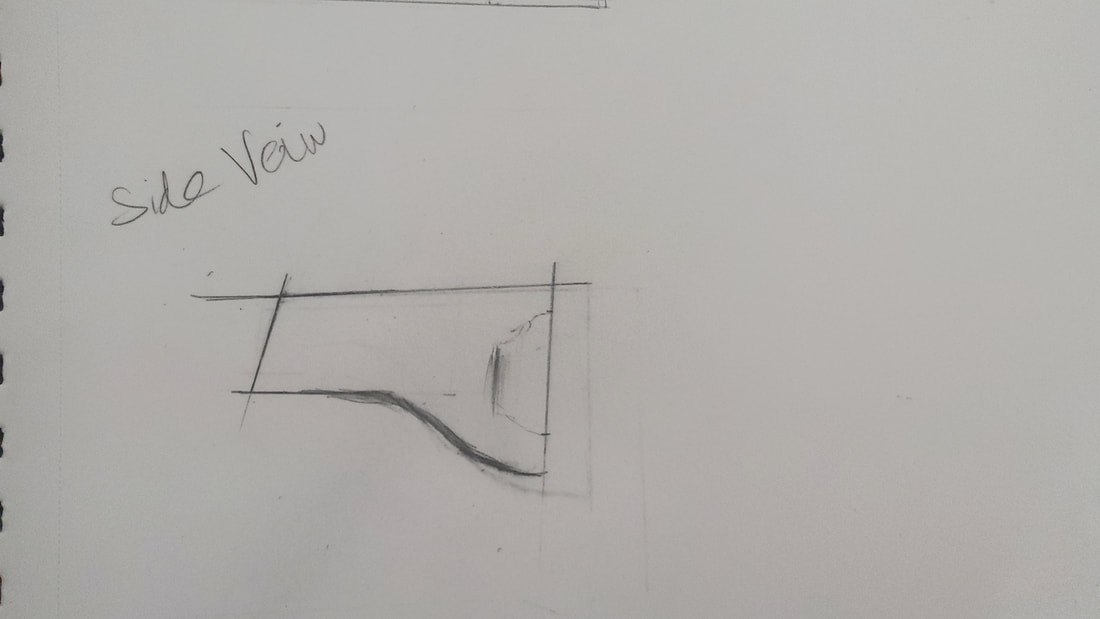
Planning Sketches
|
To the right, I have the different sketches I made. The different sketches are pretty similar as they all have to fit in the same space. After talking with the owner, he told me the thing he liked and disliked about the each sketch. Based on his feedback, I made another rough sketch which he really liked, and that will be the outline for the final design. The 3 key aspects I was aiming to have in each planning sketch were clean lines for aesthetics, best size to give peak performance, and a design that would be easy to insert as well as remove in case he needed to for whatever reason.
|
|
Inspirations
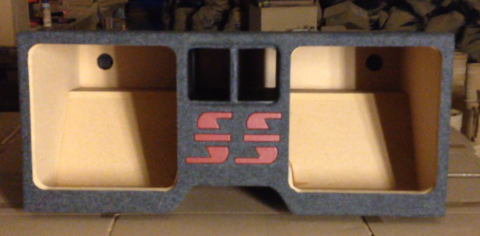
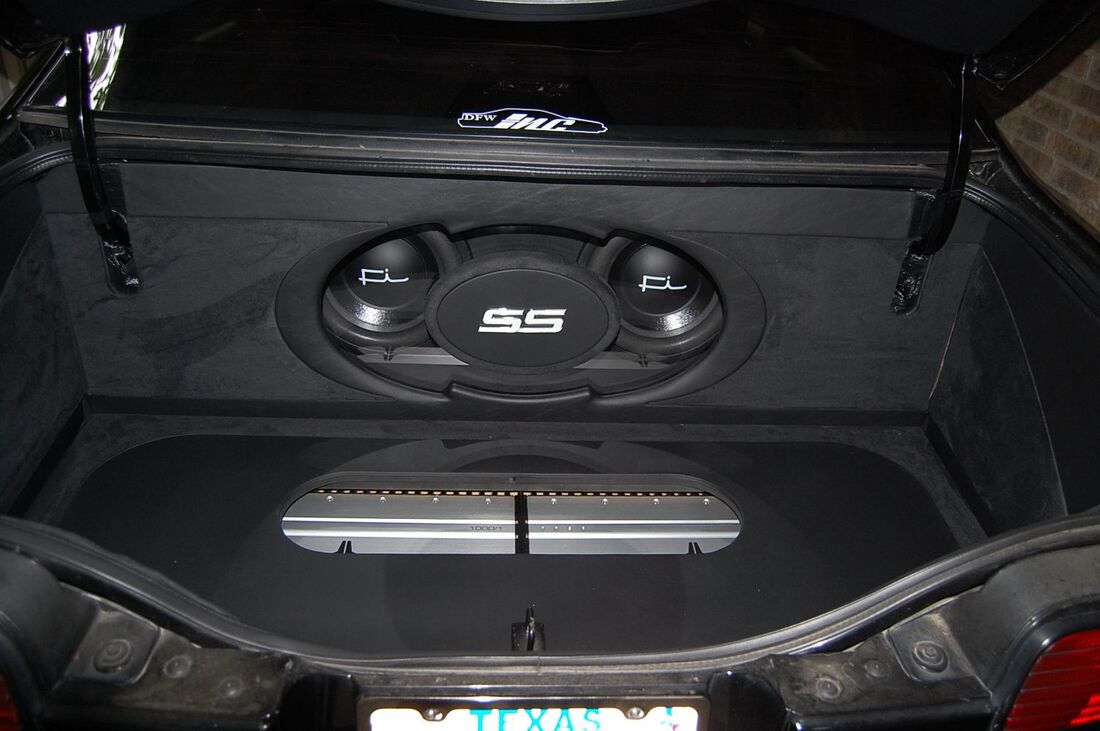
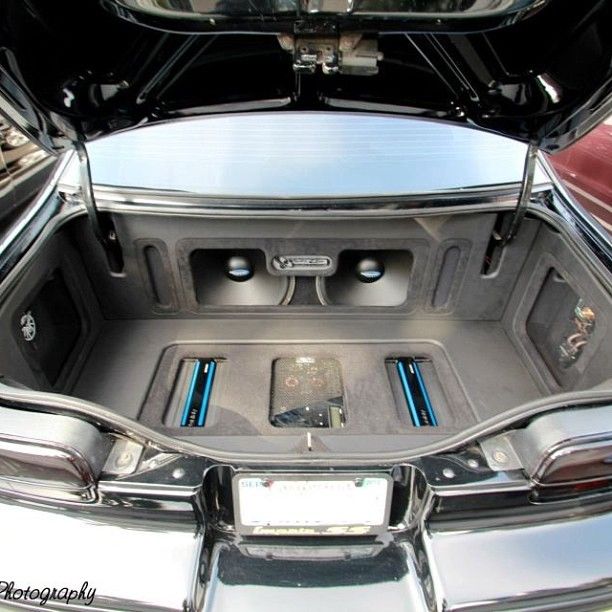
My biggest inspiration was the owner. Seeing the way his eyes lit up when talking about his car, and just the idea of being able to provide him a product that would help complete his dream car really inspired me to keep going and overcoming any issues I encountered throughout the process.
While brainstorming ideas for this project, I referred to many different forums, as well as a YouTube channel named, Car Audio Fabrication. I used these resources to better understand what a subwoofer enclosure was, how to make one, and which materials and techniques would result in the best overall design.
When coming up with ideas for the overall design, I sat down with the owner and together we searched the internet for designs that fit his style and budget. After hours of searching, the only boxes I could find were either similar to his previous boxes, which were too bulky, or they were out of his budget. Being that this is a project car and he has many things he plans to fix, buying a subwoofer box for over $400 was not the best option for him. That being said, I took notes on his favorite aspects of each design and included them in my designing phase.


Compare and Contrast
My Designs: |
Compare:
Contrast:
|
Inspirations: |